When Cancer Becomes an Emergency: What Pet Owners Need to Know

If you’re a pet parent, the thought of your furry friend facing a medical emergency is terrifying—especially when it’s something as serious as cancer. While we often associate cancer with a slow onset, some cases can turn critical overnight, leaving you scrambling for answers and care.

In this post, we’ll break down what a cancer emergency in pets looks like, how to recognize the signs early, and what steps you should take to protect your pet. Whether your dog suddenly stops eating or your cat is struggling to breathe, knowing when it’s more than “just a bad day” can be life-saving.

What Is a Cancer Emergency in Pets?

Cancer doesn’t always give a warning. While some tumors grow quietly and are caught during routine pet wellness exams, others can become urgent very quickly. A pet cancer emergency occurs when symptoms escalate rapidly or when a tumor affects critical functions like breathing, digestion, or mobility.

These emergencies may stem from:

  • Tumors pressing on vital organs
  • Internal bleeding from ruptured masses
  • Obstruction of the bladder or intestines
  • Severe pain caused by fast-growing cancers

In these situations, getting your pet to a veterinary emergency clinic ASAP is crucial. Time really does matter.

Signs Your Pet Might Be Facing a Cancer Emergency

Not all symptoms are obvious at first—but they can evolve into full-blown emergencies. Here’s what to look out for:

1. New or Rapidly Growing Lumps

A sudden lump under your pet’s skin could be harmless—but it could also signal a malignant tumor. If you notice new growths, especially ones that grow quickly or seem painful, don’t wait to get them checked.

2. Unexplained Weight Loss

Losing weight without a change in diet or activity level is often a red flag. Weight loss in petscould mean the cancer is affecting the liver, pancreas, or gastrointestinal system.

3. Sudden Lethargy or Weakness

Is your normally energetic pup refusing to move? Or your cat hiding more than usual? Excessive fatigue in pets may be due to cancers that impact the blood, bones, or organs.

4. Difficulty Breathing or Persistent Coughing

Labored breathing could point to a tumor in the lungs or chest cavity. Any noticeable changes in how your pet breathes should prompt an immediate trip to the vet.

5. Vomiting or Diarrhea That Won’t Stop

Frequent digestive issues that don’t improve with basic care might be more than just a bad tummy. Chronic vomiting or diarrhea in pets can be a symptom of abdominal tumors.

6. Unusual Bleeding or Discharge

Whether it’s blood from the nose, mouth, or an unusual discharge from other areas, this could be a serious sign of cancer—especially in older pets.

7. Trouble Urinating or Defecating

If your pet strains or can’t go to the bathroom at all, this may indicate a tumor is blocking essential pathways. This is a true emergency that needs fast intervention.

What to Do if You Suspect a Pet Cancer Emergency

Let’s say you spot one or more of the above symptoms—what now?

Step 1: Stay Calm and Take Notes

Your ability to describe symptoms clearly can help the vet make quicker decisions. Make a quick list: When did it start? Has it worsened? Are there other changes in behavior?

Step 2: Call an Emergency Vet Immediately

Don’t second-guess yourself. Call your local emergency animal hospital and let them know you’re on your way. The team can prep for your arrival and guide you on what to do during transport.

Step 3: Transport Your Pet Safely

Support your pet gently during the ride. If they’re unable to walk or are in pain, use a towel or blanket as a makeshift stretcher.

Step 4: Share Your Pet’s Medical History

If your pet has a known cancer diagnosis or has been treated before, bring all documentation. Even recent bloodwork or vet notes can speed up the diagnostic process.

What Happens at the Emergency Clinic?

Once you’re at the clinic, the vet team will jump into action. You can expect:

  • Diagnostics: Blood tests, X-rays, and ultrasounds to locate the issue.
  • Pain Relief: Your pet may be given meds to keep them comfortable right away.
  • Stabilization: IV fluids, oxygen, or emergency surgery may be needed if organs are affected.

Some clinics, like North MS Pet Emergency, specialize in urgent pet oncology, combining emergency treatment with ongoing cancer care. This means they not only handle the crisis but also set you up with a long-term care plan.

Ongoing Pet Cancer Treatment: What Comes Next?

After the emergency is managed, your pet may need continued care through pet oncology services. Treatment options vary depending on the cancer type, stage, and your pet’s overall health.

Common follow-ups include:

  • Surgery to remove tumors
  • Referrals to oncology specialists for chemotherapy or radiation
  • Palliative care focused on comfort and quality of life

The good news? With early intervention and proper treatment, many pets go on to live fulfilling, happy lives.

Final Thoughts: Don’t Wait on Unusual Symptoms

Cancer in pets is scary—but recognizing a potential emergency and acting quickly can change everything. Whether it’s a new lump or your pet is simply “not acting like themselves,” it’s better to be safe than sorry.

If you’re in the North Mississippi area and need expert help, check out North MS Pet Emergency for trusted, compassionate care specializing in pet oncology emergencies.


The Eco-Friendly Pet Parent’s Guide to a Cleaner, Safer Home

Let’s be honest—pets are adorable, loyal, and bring so much joy into our lives… but they’re also messy. From muddy paws after a walk to the occasional accident on the carpet, keeping a clean home with pets can feel like a full-time job. The good news? You don’t need to rely on harsh chemical cleaners to keep things spotless.

Eco-friendly pet cleaning is on the rise, and for good reason. It’s safer for your pets, gentler on your home, and kinder to the planet. If you’re ready to clean green and keep your fur baby safe, this guide is for you.

Why Go Green with Pet Cleaning?

Typical cleaning supplies often contain ingredients like bleach, ammonia, and phenols—chemicals that might leave your bathroom sparkling but could also trigger skin issues, respiratory problems, or worse in your pets.

Switching to pet safe cleaners means creating a healthier space for everyone in your household. Plus, eco-friendly products usually come in biodegradable packaging and are made with sustainable ingredients, which means fewer toxins entering our water systems and landfills.

Top Eco-Friendly Pet Safe Cleaners You’ll Actually Love Using

1. The Power Couple: Vinegar + Baking Soda

Looking for a quick DIY that actually works? Mix equal parts water and white vinegar in a spray bottle for an all-purpose cleaner. Sprinkle baking soda on tough stains, let it sit, then scrub away. It’s safe, cheap, and incredibly effective on pet messes.

2. Enzyme-Based Cleaners: Your Secret Weapon

These naturally derived cleaners break down odors and stains at the molecular level. They’re non-toxic, biodegradable, and ideal for deep-cleaning pet accidents without any residue.

3. Non-Toxic Floor Cleaners

Let’s not forget where your pets spend most of their time—the floor. Look for plant-based floor cleaners with no artificial dyes or fragrances. They clean just as well as traditional options, minus the chemical cocktail.

Pet Odors? Here’s How to Handle Them Safely

Forget the fake floral sprays. Conventional air fresheners often contain synthetic ingredients that just mask odors (and can even irritate your pet’s lungs). Instead, go with natural pet deodorizing sprays made from essential oils like lavender, eucalyptus, or citrus. These neutralize odors and can have calming effects on anxious pets.

Cleaner Home, Smarter Supplies

Sometimes, the best cleaning starts with prevention. Stocking up on the right eco-conscious pet supplies can make your life easier and your space fresher:

  • Microfiber Towels – Wipe paws before they leave tracks.
  • Washable Pet Bedding – Bonus points if it’s made from organic cotton or recycled materials.
  • Biodegradable Waste Bags – Say goodbye to plastic guilt.
  • Grooming Wipes – Perfect for in-between baths and made with natural ingredients.

Where to Buy Eco-Friendly Pet Products

Don’t have time for DIY? No worries. Your favorite pet supply store likely has a growing section of sustainable products—from natural shampoos to toxin-free detergents.

When browsing, check labels for:

  • Sulfate-free formulas
  • Cruelty-free logos
  • Ingredients you can pronounce

Easy Habits to Keep a Pet-Friendly Home Clean

Small changes go a long way. Here are a few pet-parent hacks to keep your home fresh:

  • Vacuum often using a HEPA filter to reduce dander and fur buildup.
  • Brush your pet regularly—less fur on your couch, more shine on their coat.
  • Clean food bowls and toys weekly with warm water and gentle soap.
  • Scoop litter boxes daily and add a natural deodorizer.

Final Thoughts: Clean Home, Happy Pets, Healthier Planet

At the end of the day, embracing eco-friendly pet cleaning solutions is about more than just aesthetics. It’s about creating a safe haven for your furry friend while doing your part for the environment.

So go ahead—ditch the bleach, grab that vinegar bottle, and explore greener options at your local pet supply store. Your pets (and the planet) will thank you.

Why Shaker Doors Are Still the Ultimate Interior Door Choice

Looking to elevate your home’s interior design without chasing fleeting trends? Enter the shaker door—a timeless staple that bridges the gap between classic charm and modern minimalism. Whether you’re updating a cozy cottage or styling a sleek new build, shaker-style doors deliver that clean, understated elegance that just works.

In this post, we’ll break down why shaker doors are a top pick for homeowners and interior designers alike, what to look for when choosing one, and how they stack up against alternatives like flush doors. Let’s get into it.

What Makes Shaker Style Doors So Popular?

1. Clean Design That Never Goes Out of Style

Shaker doors are defined by their recessed panels and straight, unadorned lines. It’s a design that’s been around for centuries, yet it continues to thrive because it suits virtually any décor—from traditional to ultra-modern.

2. Built to Last

Crafted from solid wood, MDF, or veneered materials, shaker doors are more than just a pretty face. They’re durable, resistant to warping, and hold up beautifully against daily use.

3. Totally Versatile

From natural wood finishes to bold, painted hues, shaker doors come in a range of colors and panel layouts. Whether you’re styling a rustic farmhouse or a minimalist loft, there’s a version that fits seamlessly.

4. Low Maintenance, High Reward

With their smooth surfaces and simple design, shaker doors are a breeze to clean. A quick wipe-down with a damp cloth keeps them looking brand-new.

Shaker vs. Flush Doors: Which One’s Right for You?

Not sure if shaker interior doors are your style? Let’s compare them to flush doors, another popular interior option.

FeatureShaker DoorsFlush Doors
DesignRecessed panelsSmooth, flat surface
AestheticTraditional to transitionalSleek and contemporary
MaintenanceEasy to cleanEven easier
Best ForHomes with characterMinimalist or modern spaces

In short: If you want subtle texture and timeless detail, go shaker. Prefer clean, uninterrupted lines? Flush doors are your jam.

What to Consider Before Buying Shaker Doors

Alright, you’re sold on the shaker look—but how do you choose the right one? Here’s what to think about:

Material Types

  • Solid wood: Long-lasting and natural, but more expensive
  • MDF (Medium-Density Fiberboard): Budget-friendly and warp-resistant
  • Veneered wood: Offers the wood look without the high price

Panel Options

  • Single-panel: Sleek and simple—perfect for modern homes
  • Multiple panels: Adds depth and traditional flair

Finish and Color

  • Natural wood stains: Warm and earthy
  • Painted finishes: White, black, or bold shades for contrast
  • Matte vs. Glossy: Depends on the vibe you’re going for

Door Configurations

Think beyond standard swinging doors. Shaker doors are also available as:

  • Sliding barn doors
  • Pocket doors
  • Double-door setups

Each adds functionality and style in its own way.

Where to Buy Quality Shaker Doors

Shopping for interior doors? Start by browsing a detailed door catalogue. Reputable suppliers usually offer a range of shaker door styles, customization options, and installation guides.

Before you buy, check:

  • Customer reviews and ratings
  • Return and warranty policies
  • Available materials and finishes
  • Custom sizing or design options

Quick Installation & Care Tips

Installation Tips

  • Measure twice—cut once
  • Don’t skimp on hardware
  • Hire a pro if DIY isn’t your thing

Maintenance Hacks

  • Dust regularly with a microfiber cloth
  • Use gentle cleaners to preserve the finish
  • Tighten hinges and knobs every few months

Final Thoughts: Timeless Design That Works Hard

Shaker style doors are more than a trend—they’re a design mainstay. With their durability, versatility, and low-maintenance appeal, they make an excellent long-term investment for any interior. Whether you’re renovating your forever home or flipping a rental, these doors bring a level of sophistication and simplicity that’s tough to beat.

Why Vinyl Waterproof Flooring Is a Game-Changer for Modern Homes

When it comes to interior design, few elements have as much impact as the flooring beneath your feet. It sets the stage for your entire space—visually and functionally. And if you’re navigating between elegance and practicality, vinyl waterproof flooring might just be your dream come true.

In the past, water-resistant floors were all about function, with style taking a back seat. Not anymore. Today’s waterproof vinyl flooring combines cutting-edge design with rugged durability, making it a top choice for homeowners and commercial spaces alike.

What Makes Vinyl Waterproof Flooring So Popular?

Let’s be honest: between kids, pets, and everyday messes, your floors go through a lot. Vinyl waterproof flooring steps up to the challenge with a look that can mimic everything from rustic hardwood flooring to luxurious stone tile, while standing strong against spills, scratches, and humidity.

Here’s why people are loving it:

  • 100% Waterproof – Ideal for kitchens, bathrooms, basements, and laundry rooms.
  • Scratch & Stain Resistant – Bring on the kids, pets, and party guests.
  • Ultra-Durable Wear Layer – Keeps your floors looking fresh for years.

If you’re looking for low-maintenance flooring that can handle life’s chaos and still look amazing, this one’s a no-brainer.

Style Without Compromise

One of the biggest myths about waterproof flooring is that you have to sacrifice style. That’s simply not true. Modern vinyl options come in an impressive variety of textures, colors, and finishesto suit any space.

Trending styles include:

  • Wood-look vinyl planks – Cozy and timeless, they work in almost any room.
  • Stone-look vinyl tiles – Perfect for a sleek, upscale vibe.
  • Patterned vinyl designs – Make a bold statement in entryways or bathrooms.

Whether you’re going for the warm tones of laminate flooring oak or the cool tones of modern slate, there’s a vinyl style for you.

Waterproof vs. Water Resistant: Know the Difference

This is where things can get confusing. Not all moisture-protective flooring is created equal.

  • Water-resistant flooring can handle the occasional splash but may warp or stain if exposed to standing water for long periods.
  • Waterproof vinyl flooring, on the other hand, is designed to repel water completely—no swelling, no bubbling, no damage.

So if you’re outfitting a space prone to moisture (looking at you, bathroom and kitchen), vinyl waterproof is your best bet.

Easy Maintenance, No Fuss

Who doesn’t love a floor that practically takes care of itself?

Quick cleaning tips:

  • Vacuum or sweep regularly to clear dust and grit.
  • Use a damp mop with mild cleaner for deeper cleaning.
  • Skip the harsh chemicals—they’re unnecessary and can wear down the finish.

It’s one of the few flooring options where you get long-term durability with barely any upkeep.

How Does It Stack Up to Laminate Flooring?

While laminate flooring and waterproof vinyl share some visual similarities, there are key differences:

  • Laminate can offer a stunning hardwood aesthetic, but it’s vulnerable to water damage.
  • Vinyl waterproof flooring is the MVP in moisture-heavy areas, making it better suited for spaces like basements and bathrooms.

In short, if you want a beautiful floor that also handles wet feet and rogue spills, vinyl is the clear winner.

Final Thoughts: Is Vinyl Waterproof Flooring Worth It?

Absolutely. Vinyl waterproof flooring is more than just a trend—it’s a smart investment in both style and durability. Whether you’re renovating your entire home or just updating the flooring in high-moisture areas, it’s a solution that checks all the boxes.

Ready to transform your space? Upgrade to waterproof vinyl flooring and enjoy a beautiful, stress-free surface that stands up to real life.

Why Custom Letterhead Envelopes Are a Branding Move You Shouldn’t Ignore

When was the last time you opened an envelope and thought, “Wow, that’s professional”? Probably not often—but when you do, it sticks with you.

In a digital world where emails dominate, physical mail has become an unexpected opportunity to make a bold first impression. That’s where custom letterhead envelopes come in. These aren’t just pretty packages—they’re powerful tools for branding, trust, and professionalism.

If you’re still using plain, generic envelopes for your business correspondence, it might be time for an upgrade. Here’s why.

First Impressions Happen at the Mailbox

Think of your envelope as the handshake before the conversation. Before your recipient even reads what’s inside, they’ve already formed an opinion based on what they see.

A blank envelope? Easy to overlook. But a branded envelope with your logo, company colors, and contact info? That gets noticed—and opened.

Using custom business envelopes sends a subtle but strong message: your business pays attention to detail and takes pride in presentation.

The Real Benefits of Letterhead Envelopes

1. They Reinforce Your Brand Identity

Branding is more than just your website and social media presence. It should show up everywhere—including your mail. A consistent visual identity on all outgoing communication helps build brand recognition and trust.

If you’re already using custom letterhead for documents, why stop there? Envelopes are part of the same story.

2. They Look More Professional

Let’s be honest: presentation matters. Whether you’re sending a proposal, invoice, or legal document, packaging it in a professional-looking envelope elevates your business in the eyes of your recipient.

For industries where trust and authority are everything—like law, finance, or healthcare—professional presentation is non-negotiable.

3. They Improve Mail Open Rates

People judge mail by the envelope. A custom-designed envelope sparks curiosity and makes it far more likely that your letter gets opened instead of tossed aside.

And if you include a compelling call-to-action or visual teaser? Even better.

4. They Double as a Marketing Tool

Here’s an underrated feature: your envelope can market for you. Add a catchy tagline, feature a promo code, or even drop in a QR code that leads to a landing page or special offer.

Think of it as bonus ad space that you’re already paying for.

5. They Keep Your Documents Safe

Function meets form here. Rigid mailers or premium-quality envelopes not only look good but also ensure your documents arrive intact—crucial when sending certificates, contracts, or sensitive materials.

6. They Build Trust

People trust businesses that care about the details. When a client receives a clean, well-designed envelope, it reflects positively on your company’s reliability and professionalism.

7. They Encourage Repeat Business

When a customer feels good about interacting with your brand—even at the envelope level—they’re more likely to remember you and come back for more. High-quality presentation supports long-term brand loyalty.

Choosing the Right Envelope for Your Business

Ready to upgrade your mail game? Here are a few tips before you hit print:

Pick the Right Size and Material

Not all documents fit a standard envelope. Choose materials based on what you’re sending. Use rigid envelopes for high-value or sensitive items, and standard sizes for everyday letters.

Stay on Brand

Use your logo, brand colors, fonts, and other identity markers. Keep it consistent across all your stationery to boost recognition and reinforce your branding.

Add Security If Needed

If you’re mailing confidential information, consider security features like tamper-proof seals or tinted interiors for added protection.

Bottom Line: Small Detail, Big Impact

In a competitive business world, the smallest details can make the biggest difference. Investing in custom letterhead envelopes is a low-effort, high-impact way to improve your brand’s visibility, credibility, and customer engagement.

Ready to Upgrade Your Business Mail?

Don’t let your first impression get lost in a sea of white envelopes. Add some polish to your next mail-out and let your branding speak before your letter even gets opened.

Start using custom envelopes that reflect your professionalism, build trust, and help you stand out—one envelope at a time.

Why Dental Health is Crucial for Your Pet’s Overall Well-Being

When we think of keeping our pets healthy, we often focus on their food, exercise, and routine vet visits. But there’s one critical aspect of pet care that tends to slip under the radar: dental health. Just like humans, pets need proper oral hygiene to avoid painful complications and ensure they live a long, healthy life.

Bad breath, yellowing teeth, or excessive drooling might seem like minor issues, but they can actually be warning signs of more severe dental problems. In this post, we’ll dive into why dental health matters for pets, how to spot early signs of dental disease, and practical steps you can take to keep your furry friend’s teeth and gums in top shape.

The Hidden Dangers of Poor Dental Hygiene in Pets

Dental disease in pets is surprisingly common. In fact, nearly 80% of dogs and 70% of cats will suffer from periodontal disease by the age of three. This condition develops when plaque on the teeth hardens into tartar, causing inflammation of the gums. If left untreated, it can lead to tooth loss, painful abscesses, and infections that could affect vital organs like the heart, liver, and kidneys.

But here’s the good news: Dental disease is completely preventable with the right care. By being proactive about your pet’s oral health, you can avoid these serious complications and keep your pet comfortable and healthy.

Common Dental Problems in Pets

Periodontal disease is one of the most prevalent dental issues in pets, affecting the majority of adult animals. However, there are several other conditions that can affect your pet’s teeth and gums, including:

  • Plaque and tartar buildup: A sticky film of bacteria that eventually hardens into tartar, which can irritate the gums and lead to infection.
  • Tooth decay: Cavities aren’t just a human problem; they can also affect pets if proper care isn’t taken.
  • Gum disease: Inflammation of the gums, which can cause bleeding and pain.

How to Spot Dental Disease in Your Pet

Recognizing the early signs of dental disease can prevent more severe issues down the road. Watch for these common symptoms:

  • Persistent bad breath
  • Yellow or brown tartar on teeth
  • Swollen or bleeding gums
  • Excessive drooling or licking
  • Difficulty eating or chewing
  • Loose or missing teeth

If your pet is showing any of these signs, it’s essential to schedule a dental checkup as soon as possible. Catching problems early can make treatment simpler and less expensive, so don’t wait!

Preventing Dental Disease: What You Can Do

The good news is that pet dental care doesn’t have to be complicated. With a few simple steps, you can significantly reduce the risk of dental disease:

  1. Brush Your Pet’s Teeth Regularly: Just like humans, pets benefit from regular tooth brushing. Use a pet-safe toothbrush and toothpaste, brushing at least a few times a week.
  2. Provide Dental Chews and Toys: Look for toys and treats specifically designed to help reduce plaque buildup. These can keep your pet’s teeth cleaner between brushings.
  3. Offer a Dental-Friendly Diet: Some pet foods are formulated to help reduce tartar buildup and improve oral health. Ask your vet for recommendations based on your pet’s specific needs.
  4. Schedule Professional Cleanings: Just like us, pets need professional dental cleanings to maintain optimal oral health. Regular cleanings remove hardened tartar that brushing can’t reach.

Why Professional Cleanings Matter

Even with a solid at-home routine, professional dental cleanings are crucial for maintaining your pet’s oral health. During these cleanings, a veterinarian will scale and polish your pet’s teeth, removing plaque and tartar that can lead to disease. In some cases, dental X-rays may be required to check for underlying issues beneath the gums.

If your pet has advanced dental disease, extractions may be necessary to prevent further complications. Regular professional cleanings can help catch and address these problems early.

How Dental Health Impacts Your Pet’s Overall Health

Dental health isn’t just about keeping your pet’s teeth and gums in good shape—it’s about their overall well-being. Bacteria from periodontal disease can enter the bloodstream and spread to major organs, increasing the risk of:

  • Heart disease: Bacteria from infected gums can cause inflammation in the heart.
  • Kidney disease: Infections in the mouth can damage kidney function over time.
  • Liver disease: Oral bacteria can also affect the liver, leading to chronic conditions.

By prioritizing your pet’s dental care, you’re also helping to safeguard their general health and longevity.

At-Home Tips for Maintaining Your Pet’s Dental Health

While professional care is crucial, daily at-home care plays an important role in preventing dental issues. Here are some easy steps to follow:

  • Brush your pet’s teeth: Aim to brush at least three times a week, using a soft-bristled toothbrush and pet-friendly toothpaste.
  • Provide dental-friendly treats: Look for treats that are designed to support oral health by reducing plaque and tartar.
  • Use chew toys: These toys can help naturally clean your pet’s teeth and gums.

Remember, consistency is key. The more regularly you care for your pet’s teeth, the healthier their mouth will be in the long run.

Final Thoughts: Schedule Your Pet’s Dental Exam Today

Dental health is an essential, but often overlooked, part of pet care. By staying on top of your pet’s oral hygiene, you can help prevent pain, disease, and more serious health problems down the road. Regular brushing, professional cleanings, and a dental-friendly diet are all important steps to take to ensure your pet’s mouth stays healthy and happy.

If you’re concerned about your pet’s dental health, it’s time to schedule a checkup. Kainer Veterinary Hospital offers comprehensive dental services to help your pet maintain healthy teeth and gums. Schedule a dental exam today and take the first step toward improving your pet’s oral hygiene and overall health.

The Ultimate Guide to Finding a Student Sublet (Without the Headache)

Whether you’re prepping for a semester abroad, landing that dream summer internship, or transferring schools mid-year, student housing can be a serious challenge. Between the tight rental markets, high costs, and sketchy listings, it’s easy to feel overwhelmed. But there’s good news—subletting is a smart, flexible, and often cheaper solution that’s tailor-made for student life.

This guide breaks down everything you need to know about finding a student sublet near your university—from timing your search to spotting scams and scoring great deals.

Why Subletting Makes Sense for Students

Subletting isn’t just a backup plan; it’s actually a smart strategy, especially if you’re looking for short-term housing. Here’s why more students are choosing sublets over traditional leases:

  • Flexible leases: Perfect for one-semester stays or summer internships.
  • Furnished apartments: No moving trucks or furniture shopping.
  • Lower upfront costs: Skip the security deposit and long-term commitment.
  • Budget-friendly: Sublets often cost less than new leases, especially in student-heavy areas.

If you’re a study abroad student, transfer student, or intern, subletting might be the best way to keep your housing simple and affordable.

Timing Is Everything: When to Start Looking

Waiting until the last minute to look for a sublet is like shopping for swimsuits in December—sure, something might be left, but don’t count on it. Here’s a general timeline to follow:

SemesterBest Time to Search
Fall (Aug–Dec)May – July
Spring (Jan–May)October – December
Summer (June–Aug)February – April

If you’re eyeing a sublet near Indiana University, Columbia University, or Boston University, starting early gives you access to more listings, better pricing, and the chance to negotiate.

Where to Find Legit Student Sublets

With so many sketchy listings floating around online, it’s important to stick to trusted platforms when searching for sublets. One standout option is Semester Sublet, a student-focused platform that vets listings to keep things safe and simple.

Here’s why Semester Sublet stands out:

  • Every lister must confirm they’re legally allowed to sublet.
  • Listings cover major campuses like NYU, Boston University, and Indiana University.
  • You deal directly with the tenant—no middlemen or inflated fees.

If you’re hunting for sublets in New York City, summer housing in Boston, or anywhere in between, Semester Sublet is a solid place to start.

Saving Money: Is Subletting Actually Cheaper?

Short answer? Usually yes.

Sublets tend to be more affordable than long-term leases, especially when you factor in no broker fees, furnished spaces, andshorter commitments. But to get the best deal, you still need to shop smart.

Pro Tips for Finding Affordable Sublets

  • Compare multiple listings in your area to spot the going rates.
  • Negotiate rent—many tenants would rather lower the price than lose a month of rent.
  • Prioritize furnished sublets to avoid spending on furniture or moving costs.

Here’s a quick comparison:

ExpenseSubletTraditional Lease
Upfront DepositOften none1–2 months’ rent
Lease Length1–6 months (flexible)12 months (fixed)
Utilities Included?SometimesUsually separate
FurnitureOften furnishedUsually unfurnished

In expensive cities like LA or NYC, short-term sublets might be priced slightly higher per month. But for students staying just a few months, the total savings are often significant.

Don’t Get Burned: Watch for These Red Flags

Not every sublet listing is legit. Protect yourself by keeping an eye out for common scams:

  • Too-good-to-be-true pricing: If it’s suspiciously cheap, it’s probably a scam.
  • No virtual or in-person tour: Always see the place before you send money.
  • No written agreement: You need documentation—no exceptions.

And remember: never wire money, pay in gift cards, or send cash.

Cities Where Sublets Go Fast

If you’re heading to any of these cities for a summer internship, don’t wait to book housing:

  • Boston
  • New York City
  • Chicago
  • Los Angeles
  • Atlanta
  • Philadelphia

These spots are packed with students and interns each summer, so demand for summer sublets can spike quickly.

Final Tips for a Stress-Free Sublet

To wrap it up, here’s your checklist for landing a student sublet that won’t drive you crazy:

  • Start early—2 to 3 months in advance is ideal.
  • Use reliable websites like Semester Sublet.
  • Vet the listing—ask for a lease agreement and do a virtual tour.
  • Know your rights—make sure subletting is allowed in the original lease.

How to Create Your Dream Kitchen with Custom DIY Cabinets: A Step-by-Step Guide

Your kitchen is more than just a place to cook—it’s the heart of your home. Whether you’re remodeling or starting fresh, the right cabinetry can elevate both the functionality and aesthetic of your space. Custom cabinets are an excellent choice for a personalized, high-quality look, but the cost can sometimes be a concern. Luckily, there’s a solution: DIY consulting for custom cabinets. With expert guidance, you can design, build, and install your dream cabinets without breaking the bank.

In this guide, we’ll walk you through how to get the perfect custom cabinets that reflect your style, meet your storage needs, and stay within your budget. Let’s dive in!

Step 1: Assess Your Kitchen Space and Needs

Before jumping into the design process, take a moment to evaluate your kitchen’s layout. A little planning upfront can save a lot of time and hassle later on. Consider these key questions:

  • What are the dimensions of your kitchen? Measure everything, from wall space to ceiling height. This will inform your cabinet design and storage options.
  • How much storage do you need? Are you looking for deep drawers, open shelving, or classic cabinets? Think about how you use your kitchen daily.
  • What style suits your home? Do you prefer a modern, minimalist look, or something more traditional? This will guide your material and finish choices.

Taking detailed notes and measurements will make it easier to communicate with your DIY consultant later on and ensure that your design works in harmony with your space.

Step 2: Explore DIY Custom Cabinet Consultation Services

While many DIY guides are available online, working with a professional consultant can make the process smoother and more enjoyable. A DIY custom cabinet consultation offers expert advice tailored to your specific needs and goals. Here’s what you can expect:

  • Personalized design recommendations based on your kitchen’s dimensions and layout.
  • Material and style suggestions that align with your budget and vision.
  • Step-by-step guidance on how to assemble and install your cabinets.
  • Ongoing support if you run into any issues during installation.

By working with a consultant, you can avoid costly mistakes and ensure that your cabinets come together just the way you envision.

Step 3: Choose the Right Materials and Style

One of the most exciting parts of designing custom cabinets is selecting the materials and finishes. With so many options available, it can be overwhelming, but understanding your choices can help you narrow it down. Here are some common materials and styles to consider:

Materials:

  • Solid Wood – Classic and durable, perfect for a high-end, natural look.
  • MDF (Medium-Density Fiberboard) – A smooth, affordable option for painted finishes.
  • Plywood – Lightweight and strong, commonly used for cabinet boxes.
  • Laminate – A budget-friendly choice with a variety of color and texture options.

Styles:

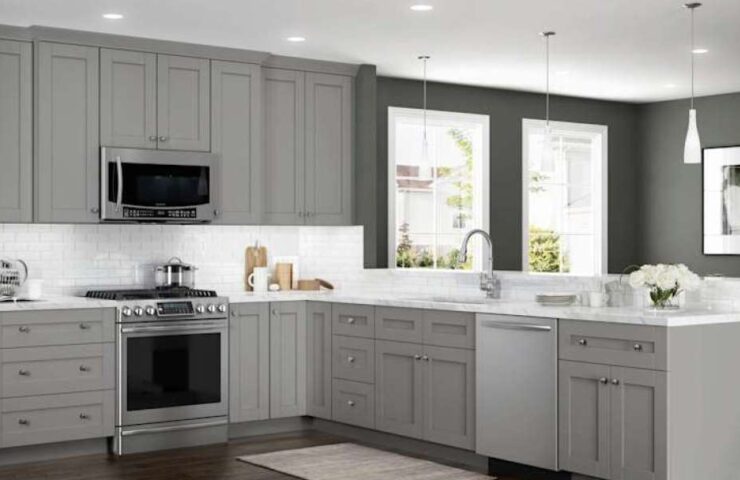
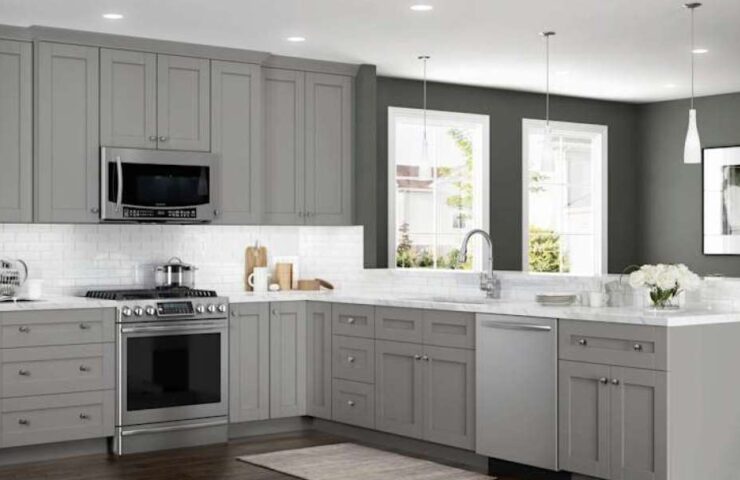
  • Shaker Cabinets – Simple, with clean lines, perfect for a timeless appeal.
  • Flat-Panel Cabinets – Sleek, modern, and minimalist.
  • Inset Cabinets – Elegant and traditional, with doors that sit flush against the frame.
  • Glass-Front Cabinets – Ideal for displaying dishware or creating an open feel.

Your choices should reflect your personal style, but also consider durability and ease of maintenance, especially for high-traffic areas like the kitchen.

Step 4: Set a Budget and Timeline

One of the biggest advantages of a DIY approach is that you can control costs. However, careful planning is key to ensuring your project stays within budget. Here are some factors to include in your DIY custom cabinet budget:

  • Material costs – The type of wood or laminate you choose will impact the price.
  • Tools and hardware – You’ll need a few tools, such as a drill, clamps, and screws, plus any special hardware like hinges and knobs.
  • Installation – While DIY installation is cost-effective, you may need professional help for specific tasks (like electrical work for lighting).

Additionally, think about your timeline. Custom cabinets take time to design, order, and install, so be realistic about how long the project will take.

Step 5: Prepare for Installation

Once your cabinets are designed and the materials are in hand, it’s time to get ready for installation. Follow these steps to ensure the process goes smoothly:

  1. Gather the tools – You’ll need a drill, a level, measuring tape, and clamps.
  2. Prepare your kitchen space – Remove old cabinets, patch up any wall damage, and make sure the surface is level.
  3. Follow assembly instructions carefully – Read all guides to avoid errors during installation.
  4. Consult your expert – If you get stuck, don’t hesitate to reach out to your consultant for troubleshooting support.

Proper preparation will make installation a breeze and ensure a professional-looking result.

Step 6: Add the Finishing Touches

The final step is to add those little details that really make your cabinets shine. Consider incorporating these touches:

  • Stylish hardware – Choose knobs, handles, and pulls that complement your design.
  • Soft-close hinges – These prevent slamming doors and add durability.
  • Under-cabinet lighting – This not only enhances functionality but also creates a warm ambiance.
  • Decorative trim and molding – Adds a polished, built-in appearance to your cabinets.

These finishing touches will take your cabinets from great to exceptional, giving your kitchen a truly custom feel.

Final Thoughts: Your Dream Kitchen Awaits

Creating your dream kitchen with custom DIY cabinets is achievable with a little planning and expert advice. By taking the time to assess your space, choose the right materials, and work with a consultant, you can craft a kitchen that’s both functional and beautiful. Whether you’re looking to maximize storage or make a statement with stylish finishes, the possibilities are endless.

Why Vinyl Flooring is the Unsung Hero of Kitchens and Bathrooms

When you’re designing or renovating moisture-heavy spaces like kitchens and bathrooms, choosing the right flooring is everything. It’s not just about good looks—it’s about finding something that can handle spills, humidity, and daily wear without losing its charm.

Vinyl flooring. Affordable, stylish, and practically waterproof, it’s become a go-to for homeowners and designers alike. If you’re still debating what type of flooring to go with, here’s why vinyl deserves a spot at the top of your list.

1. Waterproof Powerhouse: Perfect for Wet Zones

Let’s face it—kitchen vinyl flooringandbathroom vinyl flooring get put through the wringer. Between splashes, spills, and the occasional plumbing surprise, your floors need to stand strong. That’s where vinyl flooring shines.

Unlike wood or laminate that can warp or crack when exposed to moisture, vinyl is crafted from synthetic materials that repel water. No swelling. No buckling. Just clean, dry floors that handle chaos like a pro.

Why it works:

  • Great for high-humidity areas
  • Ideal for homes with kids, pets, or high traffic
  • Resists water damage like a champ

Thinking of upgrading? Explore our wide selection of waterproof vinyl flooring designed to thrive in moisture-rich environments.

2. Cleaning? A Total Breeze

Nobody wants high-maintenance floors—especially in the two messiest rooms of the house. From spaghetti splatters to muddy paw prints, vinyl flooring handles it all without fuss.

Forget the fancy cleaning routines. A simple mop, some mild soap, and you’re done. No waxing, sealing, or special products needed. Just shine on, day after day.

Great for:

  • Busy kitchens where spills are inevitable
  • Homes with toddlers, pets, or frequent guests
  • Anyone who hates scrubbing floors

Need help finding a style that’s both chic and easy to maintain? Our guide to low-maintenance vinyl kitchen flooring can help you pick the perfect match.

3. Built Tough for Daily Life

Let’s talk durability. Vinyl is deceptively strong. It stands up to scratches, dents, and daily foot traffic better than many other types of flooring—making it perfect for high-traffic kitchens and bathrooms that see a lot of action.

Thanks to built-in wear layers, many modern vinyl styles are built to last for years without losing their visual appeal. So even if life gets a little chaotic, your floors won’t show it.

Perfect for:

  • High-traffic homes
  • Homes with kids or large families
  • Kitchens with heavy-duty use

Looking for something that’s built to last? Check out our curated picks of durable vinyl flooring options that are both stylish and sturdy.

4. Style That Doesn’t Compromise

One of the best things about vinyl? It doesn’t look like vinyl. Thanks to today’s advanced printing technology, you can mimic the look of everything from rich hardwood and elegant stone to minimalist concrete—without the price tag or the maintenance.

Whether your vibe is modern, rustic, farmhouse, or somewhere in between, vinyl has you covered. You get the aesthetic you want with the performance you need.

Popular vinyl styles for kitchens and bathrooms:

  • Rustic wood grain finishes
  • Matte stone textures
  • Sleek, modern monochrome

For more inspiration, browse our latest vinyl bathroom flooring styles that marry form and function.

5. Budget-Friendly Beauty

We get it—renovations add up fast. That’s where vinyl flooring offers a major win. It delivers high-end style without the high-end price tag. On top of the affordable materials, the easy upkeep means you save on maintenance long-term too.

Ideal for:

  • Homeowners renovating on a budget
  • First-time homeowners
  • Cost-conscious remodels that still want wow-factor

Learn more about the value-packed options in our affordable vinyl flooring collection.

Ready to Upgrade Your Floors?

If you’re planning a kitchen or bathroom revamp, don’t overlook the impact great flooring can make. Vinyl is easy to install, easy to love, and easier to live with.

Want to explore more?

Visit our site to check out trending styles, request a sample, or chat with a flooring expert today. Your dream space starts from the ground up—make it a strong (and stylish) one.

How to Deal with Mold in Your Home Before It Becomes a Serious Problem

Let’s face it—mold is one of those home issues that can creep up quietly and then explode into a major headache. Whether you’re a homeowner, renter, or property manager, knowing how to handle mold growth quickly and safely is crucial. Mold isn’t just unsightly—it’s a health hazard and a potential money pit if ignored too long.

In this guide, we’ll break down the basics of mold: what it is, why it matters, how to get rid of it, and—most importantly—how to prevent it from coming back.

What Is Mold and Why Should You Care?

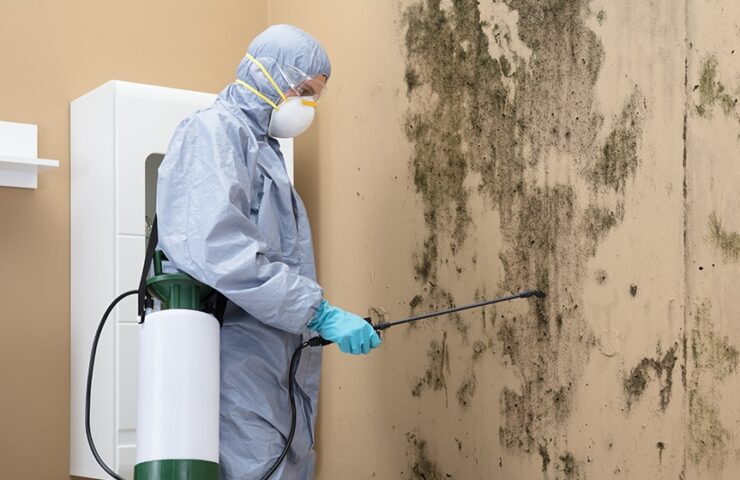
Mold is a type of fungus that thrives in damp, warm environments. You might spot it as black, green, white, or even yellow fuzzy patches on walls, ceilings, or floors. But the biggest issue with mold isn’t just how it looks—it’s how it affects your health and your property.

People with allergies, asthma, or weakened immune systems are particularly sensitive to mold exposure. Symptoms can range from coughing and sneezing to more serious conditions like asthma attacks and chronic respiratory issues. Even if you’re healthy, prolonged exposure to mold is never a good idea.

If you’re noticing a persistent musty odor or experiencing unexplained health symptoms, those could be red flags of a hidden mold infestation.

Common Signs You’ve Got Mold

Before you panic, here are some signs to look for:

  • Visible mold growth (green, black, or white spots)
  • Earthy or musty smells
  • Water stains or discoloration on walls or ceilings
  • Recurring allergy-like symptoms when indoors

The earlier you catch these signs, the easier and less expensive it is to fix.

The Right Way to Remove Mold: Step-by-Step

If you’re ready to tackle mold head-on, here’s a breakdown of what proper mold remediation should look like:

1. Find the Moisture Source

Mold is just a symptom. The real problem? Moisture. Whether it’s a leaky pipe, a poorly ventilated bathroom, or rising humidity, you need to find and fix the moisture source first. Otherwise, the mold will just keep coming back.

2. Contain the Area

During removal, mold spores can travel through the air and settle in other rooms. Use plastic sheeting, seal off the space, and set up negative air pressure if possible to prevent cross-contamination.

3. Suit Up: Safety First

Wear protective gear—this includes gloves, goggles, and an N95 mask or better. Mold spores are tiny and can be dangerous if inhaled, especially during removal.

4. Remove the Mold

For small areas, a mix of vinegar, bleach, or commercial mold cleaners can do the trick. For larger infestations, though, you might need to tear out and replace materials like drywall or carpet.

5. Disinfect Everything

After removal, clean all surfaces thoroughly. Even invisible spores can linger, so sanitizing is a must to prevent regrowth.

6. Dry the Area Completely

Mold loves moisture. Use dehumidifiers and fans to thoroughly dry out the area. Monitor humidity levels and keep them under 50% to discourage future mold formation.

Long-Term Mold Prevention Tips

Once your home is mold-free, here’s how to keep it that way:

  • Fix leaks fast—don’t let moisture sit.
  • Use dehumidifiers in basements and bathrooms.
  • Improve ventilation—install exhaust fans, open windows.
  • Regularly inspect high-risk areas like behind furniture or under sinks.
  • Maintain your HVAC system to reduce indoor humidity and ensure good airflow.

When to Call the Pros

If the mold problem is extensive (covering more than 10 square feet) or you have health concerns, it’s wise to bring in a professional mold remediation specialist. They have the equipment and training to remove mold safely and thoroughly.

For a deeper dive into mold removal techniques and expert advice, check out the original article here.

Final Thoughts

Mold isn’t just a cosmetic issue—it’s a signal that something’s not right with your home’s environment. Acting quickly can save your health, your wallet, and your property.

Got mold? Don’t wait. Tackle it now and take steps to prevent it from coming back stronger.

Need more home care tips or expert mold removal help? Subscribe to stay updated on DIY fixes, property maintenance advice, and more homeowner hacks.

Feeling Dizzy from a Sinus Infection? Here’s Why It Happens—and What You Can Do About It

Ever had a nasty sinus infection and suddenly felt like the room was spinning—or like your brain was wrapped in cotton? You’re not losing it. That off-balance, floaty feeling could actually be your sinuses messing with your inner ear. Yep, there’s a real connection between sinus infections and dizziness—and it’s more common than you might think.

Let’s explore how these two seemingly unrelated issues are actually linked, what symptoms to watch out for, and how you can treat (and prevent) this super annoying combo.

How Your Sinuses Can Throw Off Your Balance

We all know the classic sinus infection symptoms—congestion, facial pressure, maybe a headache that feels like a jackhammer. But dizziness? That one surprises a lot of people.

Here’s what’s really going on: the Eustachian tube, a narrow canal that connects your middle ear to the back of your nose and throat, helps regulate pressure in your ear. When your sinuses are inflamed or congested, that tube can get blocked, and the result is a messed-up sense of balance.

Here are the main ways your sinuses can lead to dizziness:

1. Eustachian Tube Dysfunction

This one’s a biggie. When the Eustachian tube gets blocked due to sinus inflammation, it can cause pressure to build up in your ears. That pressure throws off your equilibrium, resulting in dizziness, muffled hearing, and sometimes even ear pain.

2. Inner Ear Trouble

In more severe cases, sinus infections can trigger fluid buildup near the inner ear—aka your body’s balance center. That can cause vertigo, or that weird spinning sensation that makes it feel like your surroundings are tilting.

3. Increased Head Pressure

Swollen sinuses can increase the pressure inside your head, which might also affect blood flow. This pressure shift can make you feel lightheaded or mentally foggy.

4. The Postnasal Drip Effect

All that excess mucus has to go somewhere. When it drips down your throat and irritates the ear area, it can lead to feelings of nausea or just general “offness.”

Signs Your Dizziness Might Be Sinus-Related

Not all dizziness is tied to your sinuses, but it’s worth taking note if you’re also dealing with:

  • A stuffy nose or nasal blockage
  • Pressure or pain around your forehead and cheeks
  • Postnasal drip or thick mucus
  • Ear fullness or a popping sensation
  • Headaches that get worse when you bend over
  • That telltale vertigo or spinning feeling

If you’re nodding along, your dizziness might be rooted in your sinus issues.

When to See a Specialist (Don’t Just Ride It Out)

Most minor sinus infections resolve on their own, but if your dizziness sticks around, gets worse, or starts impacting your daily life, it’s time to see an ENT (ear, nose, and throat specialist).

You should definitely book an appointment if:

  • The dizziness lasts more than a few days
  • You get frequent sinus infections
  • Your hearing feels different or off
  • Balance issues make daily tasks feel unsafe
  • Home remedies aren’t helping

Sinus-Related Dizziness: What Can You Do About It?

Depending on what’s causing the infection—bacteria, allergies, or chronic inflammation—there are several treatment options that can help clear up your sinuses and restore your balance:

  • Saline nasal rinses: Great for clearing out mucus and opening blocked sinuses.
  • Nasal corticosteroids: These reduce swelling and improve airflow.
  • Antibiotics: If your infection is bacterial, a prescription might be necessary.
  • Decongestants or antihistamines: Especially helpful if your sinus pressure is allergy-related.
  • Balloon sinuplasty: A minimally invasive option that opens up blocked sinus passages.
  • Steam therapy and hydration: Old-school, but super effective.

If your dizziness is caused by fluid in the ear, your ENT may recommend specific treatments aimed at restoring pressure balance.

Daily Habits to Keep Sinus Infections (and Dizziness) Away

A few lifestyle tweaks can go a long way in keeping your sinuses—and your balance—healthy:

  • Use a humidifier to add moisture to dry indoor air
  • Keep your allergies under control with appropriate meds
  • Stay well-hydrated
  • Avoid allergens and irritants like dust, smoke, and pollen
  • Wash your hands often to avoid catching sinus-triggering viruses

Take a Breath—and Get Your Balance Back

Dizziness isn’t something to brush off, especially when it could be linked to recurring sinus issues. Luckily, you don’t have to live in a fog. Clinics like Ventura ENT offer specialized treatment plans, including non-surgical sinus relief like balloon sinuplasty, that can help you breathe easier—and feel steadier.

If you’re tired of feeling off-balance, don’t wait. Get the answers (and the treatment) you need to take back control of your health.

Ready to Clear the Fog?

If sinus infections and dizziness are messing with your day-to-day life, it’s time to take action. Book a consultation with an ENT specialist and explore options tailored to your unique needs. You deserve to breathe easy—and stay grounded.

Say Goodbye to Snoring: Natural Solutions for a Quieter Night’s Sleep

Snoring isn’t just a nighttime annoyance—it can be a real sleep disruptor, relationship strain, and even a sign of deeper health issues. If you or your partner find yourselves tossing and turning due to relentless snoring, you’re far from alone. Millions of people deal with this issue nightly, but here’s the good news: help is available, and it doesn’t have to involve surgery.

In this post, we’re diving into natural and non-invasive snoring treatments that can improve your sleep quality, restore peace to your bedroom, and boost your overall well-being. Let’s explore why we snore, what it means for your health, and how professionals like Dr. Armin Alavi, an ENT specialist in Camarillo, are helping patients breathe—and sleep—more easily.

What Causes Snoring?

Snoring happens when air struggles to move freely through your airways during sleep. This causes tissues in the throat and nose to vibrate, producing that all-too-familiar sound. But why does this happen?

There’s no one-size-fits-all answer. Common culprits include:

  • Nasal or throat congestion
  • Sleeping on your back
  • Being overweight
  • Anatomical issues like a deviated septum

Understanding the root cause is key to effective treatment, and that’s where working with an ENT doctor like Dr. Alavi can make a difference. With global training credentials from the Royal College of Surgeons of England to the USC Medical Center in Los Angeles, he brings a uniquely broad perspective to every patient he sees.

Snoring’s Sneaky Side Effects

Sure, snoring is annoying. But did you know it can also harm your physical health and emotional well-being?

Frequent snoring can lead to:

  • Poor sleep quality
  • Daytime fatigue
  • Brain fog and reduced concentration
  • Relationship tension due to disrupted sleep

When left unaddressed, chronic snoring may even signal obstructive sleep apnea, a more serious condition that can increase your risk of heart disease, high blood pressure, and more.

Easy Lifestyle Tweaks That Can Make a Big Difference

Before considering medical devices or surgical options, it’s worth exploring some lifestyle changes. These small adjustments can often deliver big results:

1. Weight Loss and Healthy Living

Excess weight—especially around the neck—can narrow your airways. Dropping even a few pounds can reduce snoring significantly. Dr. Alavi’s clinic offers weight management strategies that not only help with snoring but also improve your overall health.

2. Sleep Position Hacks

Back sleeping tends to worsen snoring by allowing your tongue to fall backward, obstructing airflow. Training yourself to sleep on your side (yes, it’s possible!) can lead to noticeable improvement. Dr. Alavi provides practical tools to help you maintain better sleep posture all night long.

3. Make Your Bedroom Snore-Friendly

Environmental changes can support better breathing. Clean air, proper humidity, and a comfortably cool room can all help minimize airway irritation. Dr. Alavi offers personalized advice on creating a bedroom that supports deep, snore-free sleep.

Advanced Non-Surgical Treatments

If lifestyle changes don’t fully fix the issue, don’t worry—there are still plenty of non-invasive options on the table. Some of the most effective treatments include:

  • Custom oral appliances
  • Nasal dilators and breathing aids
  • Innovative airway support devices

Thanks to Dr. Alavi’s international training, his practice in Camarillo provides a diverse range of treatment options pulled from best practices around the globe.

Could It Be Sleep Apnea?

Sometimes, persistent snoring is more than just snoring. If it’s paired with choking sounds, gasping, or extreme daytime fatigue, it might be sleep apnea—a serious condition that disrupts your breathing multiple times per night.

Dr. Alavi’s clinic can arrange for a professional sleep study to determine whether sleep apnea is at play and ensure you receive the appropriate care.

Personalized Treatment That Evolves With You

One of the standout features of Dr. Alavi’s approach is the customization of care. Every patient receives a plan tailored to their specific snoring triggers, lifestyle, and medical history. Fluent in multiple languages including Spanish, German, and Persian, he ensures clear communication with a diverse patient base.

And because treatment isn’t a one-and-done deal, his team provides ongoing support to adjust and fine-tune your plan as needed—so you can keep sleeping better for the long haul.

When Snoring Requires Urgent Medical Attention

While most snoring cases are harmless, some red flags mean it’s time to seek emergency care. If you’re dealing with severe ear pain, facial paralysis, a high fever, or dizziness, don’t wait—get checked out immediately. These symptoms could point to something more serious.

Ready to Reclaim Restful Sleep?

Snoring doesn’t have to be a permanent fixture in your life—or your relationship. Whether you’re just beginning your journey or ready to explore advanced treatment, Dr. Alavi’s comprehensive, compassionate care offers real solutions.

To learn more about his approach and book a consultation, visit the original article on Dr. Armin Alavi’s website for full details.

Laminate Flooring: The Budget-Friendly Makeover Your Home Deserves

If you’re dreaming of upgrading your floors but don’t want to empty your wallet, laminate flooring might just be your home’s new best friend. It’s stylish, durable, low-maintenance, and kind to your budget—a triple win in the world of interior design. Whether you’re revamping your living room or giving your kitchen a fresh look, laminate offers a sleek, modern finish without the hassle (or price) of traditional hardwood or stone. Let’s dive into why laminate flooring continues to trend upward—and how it could be the perfect match for your space. What Exactly Is Laminate Flooring? Think of laminate flooring as the cool, reliable cousin of hardwood. It’s made up of multiple layers:

  • A durable wear layer on top to resist scratches and stains
  • A photographic layer that mimics the look of wood, tile, or stone
  • A strong core layer (typically high-density fiberboard) for support
  • And a bottom layer that helps prevent moisture damage

It’s this layered structure that gives laminate its versatility and durability—without the cost or upkeep of natural materials.

Why Homeowners Are Loving Laminate

1. Durability That Handles Real Life

Between kids, pets, and everyday wear and tear, your floors go through a lot. Laminate handles it like a champ. Thanks to its tough top layer, it resists scratches, dents, fading, and even stains—making it a great fit for high-traffic areas like hallways, kitchens, and living rooms.

2. Budget-Friendly and Beautiful

If you love the look of hardwood flooring but not the price tag, laminate is your shortcut to elegance. It mimics natural materials so well that many people can’t tell the difference—until they see the price. Plus, it’s faster (and often cheaper) to install, especially with modern click-lock systems that are DIY-friendly.

3. Endless Design Options

Whether your vibe is modern farmhouse, sleek and minimalist, or something more traditional, laminate has a style for you. It comes in a massive range of colors, textures, and finishes—think rustic oak, polished stone, or even reclaimed wood aesthetics.

This variety makes laminate flooring a versatile match for nearly any room or design scheme.

4. Low-Maintenance Living

No need for refinishing, waxing, or deep cleaning here. Laminate floors just need regular sweeping or vacuuming, plus the occasional damp mop. It’s a time-saver, especially for busy homes with kids or pets.

5. A Greener Choice

Looking for eco-conscious home upgrades? Many laminate options are made using recycled materials and sustainable wood composites. Some brands even skip the harsh chemicals in favor of eco-friendly adhesives. It’s a solid step toward reducing your home’s environmental footprint.

Laminate Flooring vs Hardwood: Which Wins?

Let’s be real: hardwood flooring has that timeless charm. But with great beauty comes great responsibility—think regular refinishing and a bigger price tag. On the other hand, laminate is more affordable, highly durable, and way easier to maintain.

Modern laminate even does an incredible job of mimicking the look and feel of real wood. Unless you’re an expert, you probably won’t notice the difference—and your budget definitely will.

Easy Installation (Yes, Even DIY!)

Another major perk? Laminate is known for its quick and simple installation. Most planks feature a click-and-lock system that doesn’t require glue or nails. Many homeowners tackle it as a weekend DIY project, although you can always call in a pro for a polished finish.

Better yet, laminate can be laid over most existing floors, including vinyl and concrete, with minimal prep.

Where Can You Use Laminate Flooring?

Short answer: pretty much everywhere. Laminate works well in bedrooms, home offices, and dining areas. And with moisture-resistant options available, even bathrooms and laundry rooms are fair game.

Just make sure to pick the right type of laminate for each space. For rooms with potential moisture exposure, opt for water-resistant laminate to avoid any surprises down the road.

Final Thoughts: Is Laminate Flooring Right for You?

If you’re after a stylish, strong, and cost-effective flooring solution, laminate flooring is a serious contender. It offers the high-end look of hardwood or stone, minus the maintenance headaches and steep costs. Perfect for modern homes and busy lives.

Ready to explore your options? Learn more in this comprehensive Laminate Flooring Guide to help you find the perfect fit for your home and lifestyle.

Why Gut Health Is the Key to Better Liver Detox (And How to Support Both)

When we think about detoxing the body, we often picture green juices, sweaty workouts, or those mysterious “cleanse” kits. But here’s a truth bomb that deserves more attention: your liver can’t do its job well unless your gut is healthy. Surprised? You’re not alone.

The gut-liver connection, often referred to as the gut-liver axis, is a fascinating and powerful relationship that influences everything from your immune function to how well your body clears out toxins. Let’s break down what this means—and how you can support this vital system with a few simple (and science-backed) habits.

Meet the Gut-Liver Axis: Your Body’s Internal Detox Dream Team

Here’s how it works: your gut and liver are physically connected by the portal vein, a kind of superhighway that transports everything absorbed in your intestines—nutrients, toxins, and microbial byproducts—straight to your liver.

If your gut is healthy and balanced, this system flows smoothly. But if your gut microbiome is out of whack or you’re dealing with leaky gut syndrome, toxins and harmful bacteria can slip through the cracks, reaching your liver and overwhelming its natural detox processes.

Over time, this can lead to systemic inflammation, poor nutrient absorption, and decreased liver function—all of which impact your overall health and energy.

How Gut Health Supports Liver Detoxification

A strong digestive system doesn’t just help you break down food—it actively protects your liver. Here’s how:

  • Lowers the toxin load: Healthy gut bacteria break down harmful substances before they ever reach your liver.
  • Boosts nutrient absorption: Antioxidants, vitamins, and other nutrients essential for liver health are better absorbed with a balanced microbiome.
  • Reduces inflammation: Chronic gut inflammation can damage liver tissue. Certain probiotics, like Lactobacillus rhamnosus, help fight this by calming inflammation and supporting detox pathways.

The Power of Probiotics for Gut-Liver Health

Want to give your gut-liver axis some love? Probiotics are one of the most effective tools in your wellness toolkit. These beneficial microbes help rebalance your gut microbiome, minimize harmful endotoxins, and improve bile acid metabolism—an essential step in detoxification.

One probiotic getting a lot of attention for liver support is Omni-Biotic Hetox. Formulated specifically for the gut-liver axis, it’s shown in clinical studies to:

  • Reduce endotoxin levels
  • Improve cardiometabolic health
  • Support natural liver detox pathways

If you’re looking to improve your liver health from the inside out, it’s definitely worth exploring.

5 Gut-Healthy Habits to Boost Liver Function

Want to start strengthening your gut-liver connection today? These simple habits can make a big difference:

1. Prioritize Probiotics

Choose a high-quality probiotic designed for liver support—Omni-Biotic Hetox is a great place to start.

2. Eat More Fiber

Fruits, veggies, legumes, and whole grains feed your good gut bacteria, improving overall digestion and detox capacity.

3. Stay Hydrated

Water helps flush toxins, supports bile production, and keeps your digestive system humming.

4. Cut Down on Processed Foods

Refined sugar and ultra-processed snacks can disrupt the microbiome and tax your liver.

5. Drink Less Alcohol

Alcohol can wreak havoc on your gut microbiome and weaken your gut barrier, making it easier for toxins to slip through and hit your liver hard.

Why Omni-Biotic Stands Out

Not all probiotics are created equal. Omni-Biotic products are backed by clinical research and tailored for specific health needs. Omni-Biotic Hetox, in particular, is uniquely formulated to strengthen the gut-liver axis and support full-body detoxification.

If you’re serious about boosting liver function, managing inflammation, or improving your metabolic health, this is one probiotic worth checking out. For more info on the research and results behind it, read the original article here.

Final Thoughts: Heal the Gut, Help the Liver

Your gut and liver work in tandem to detox your body, digest nutrients, and keep you feeling your best. If you’re feeling sluggish, bloated, or just off, your gut-liver axis might need a little love.

Start small. Add a probiotic. Eat more fiber. Hydrate like it’s your job. These little shifts can have a major impact on your digestive health and liver detoxification over time.

Take action today—your gut (and your liver) will thank you tomorrow.